The menu detail sheet
Clicking a card opens the detail sheet on the right: header (photo, status tags, anomaly banner, Edit sheet / Duplicate / Archive buttons), then the three working sections.
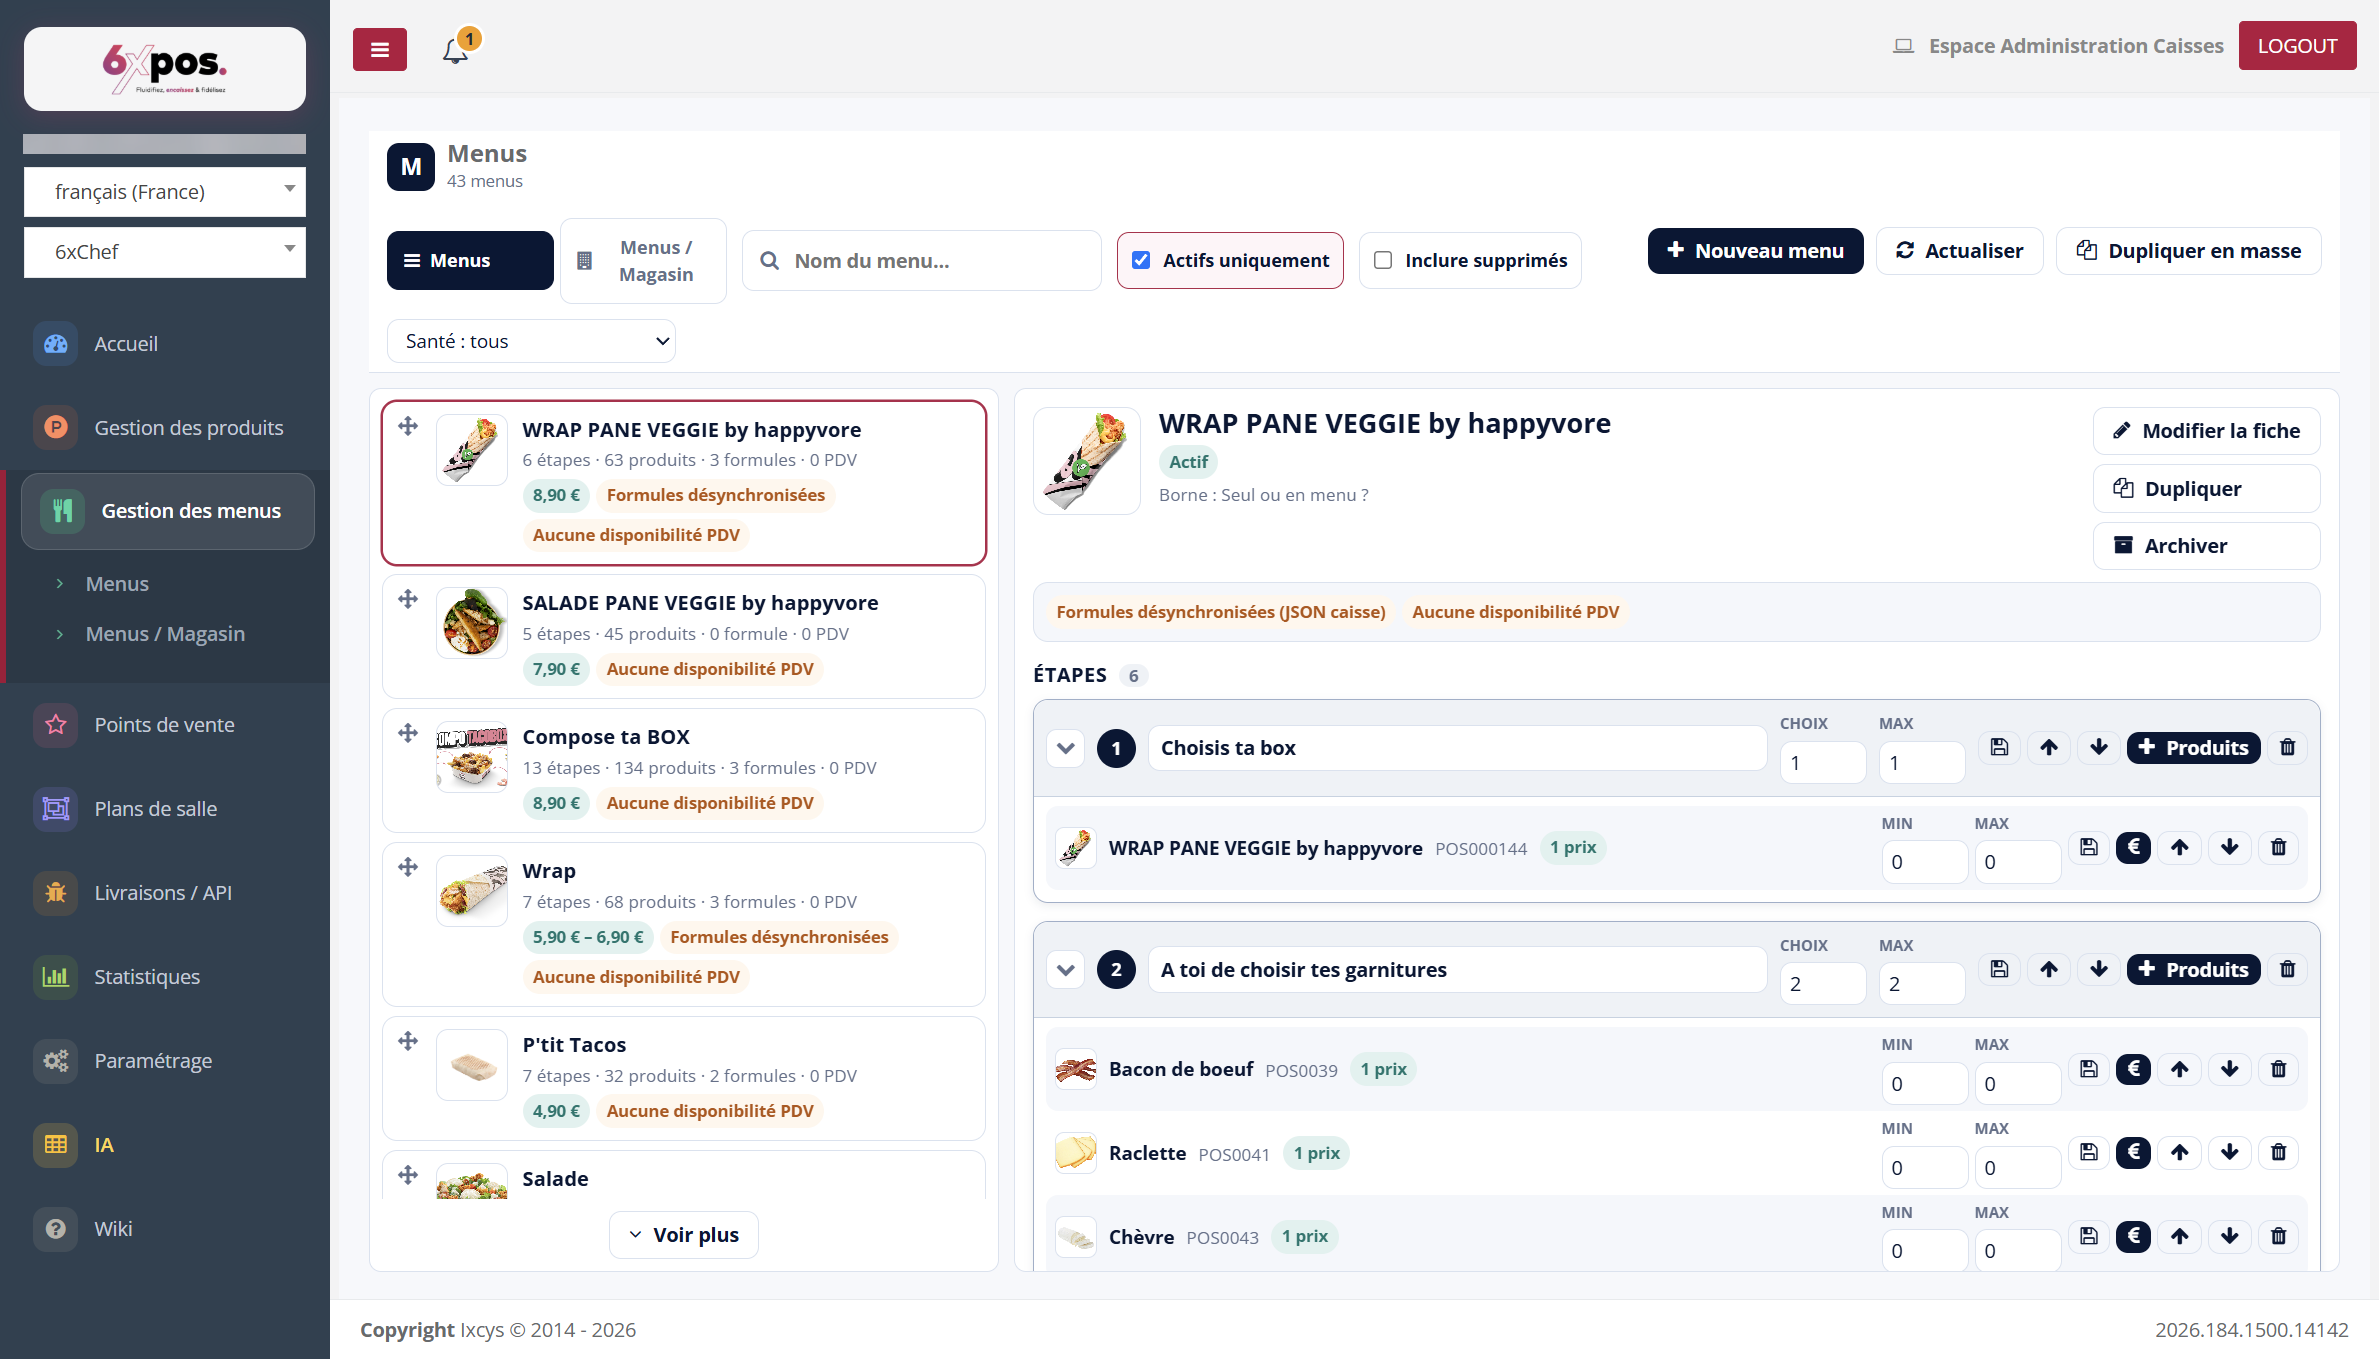
Figure 4 — The detail sheet: header with anomalies, then the three sections Steps, Prices & set menus, PDV availability.
Clicking a card opens the detail sheet on the right: header (photo, status tags, anomaly banner, Edit sheet / Duplicate / Archive buttons), then the three working sections.
Edit the sheet
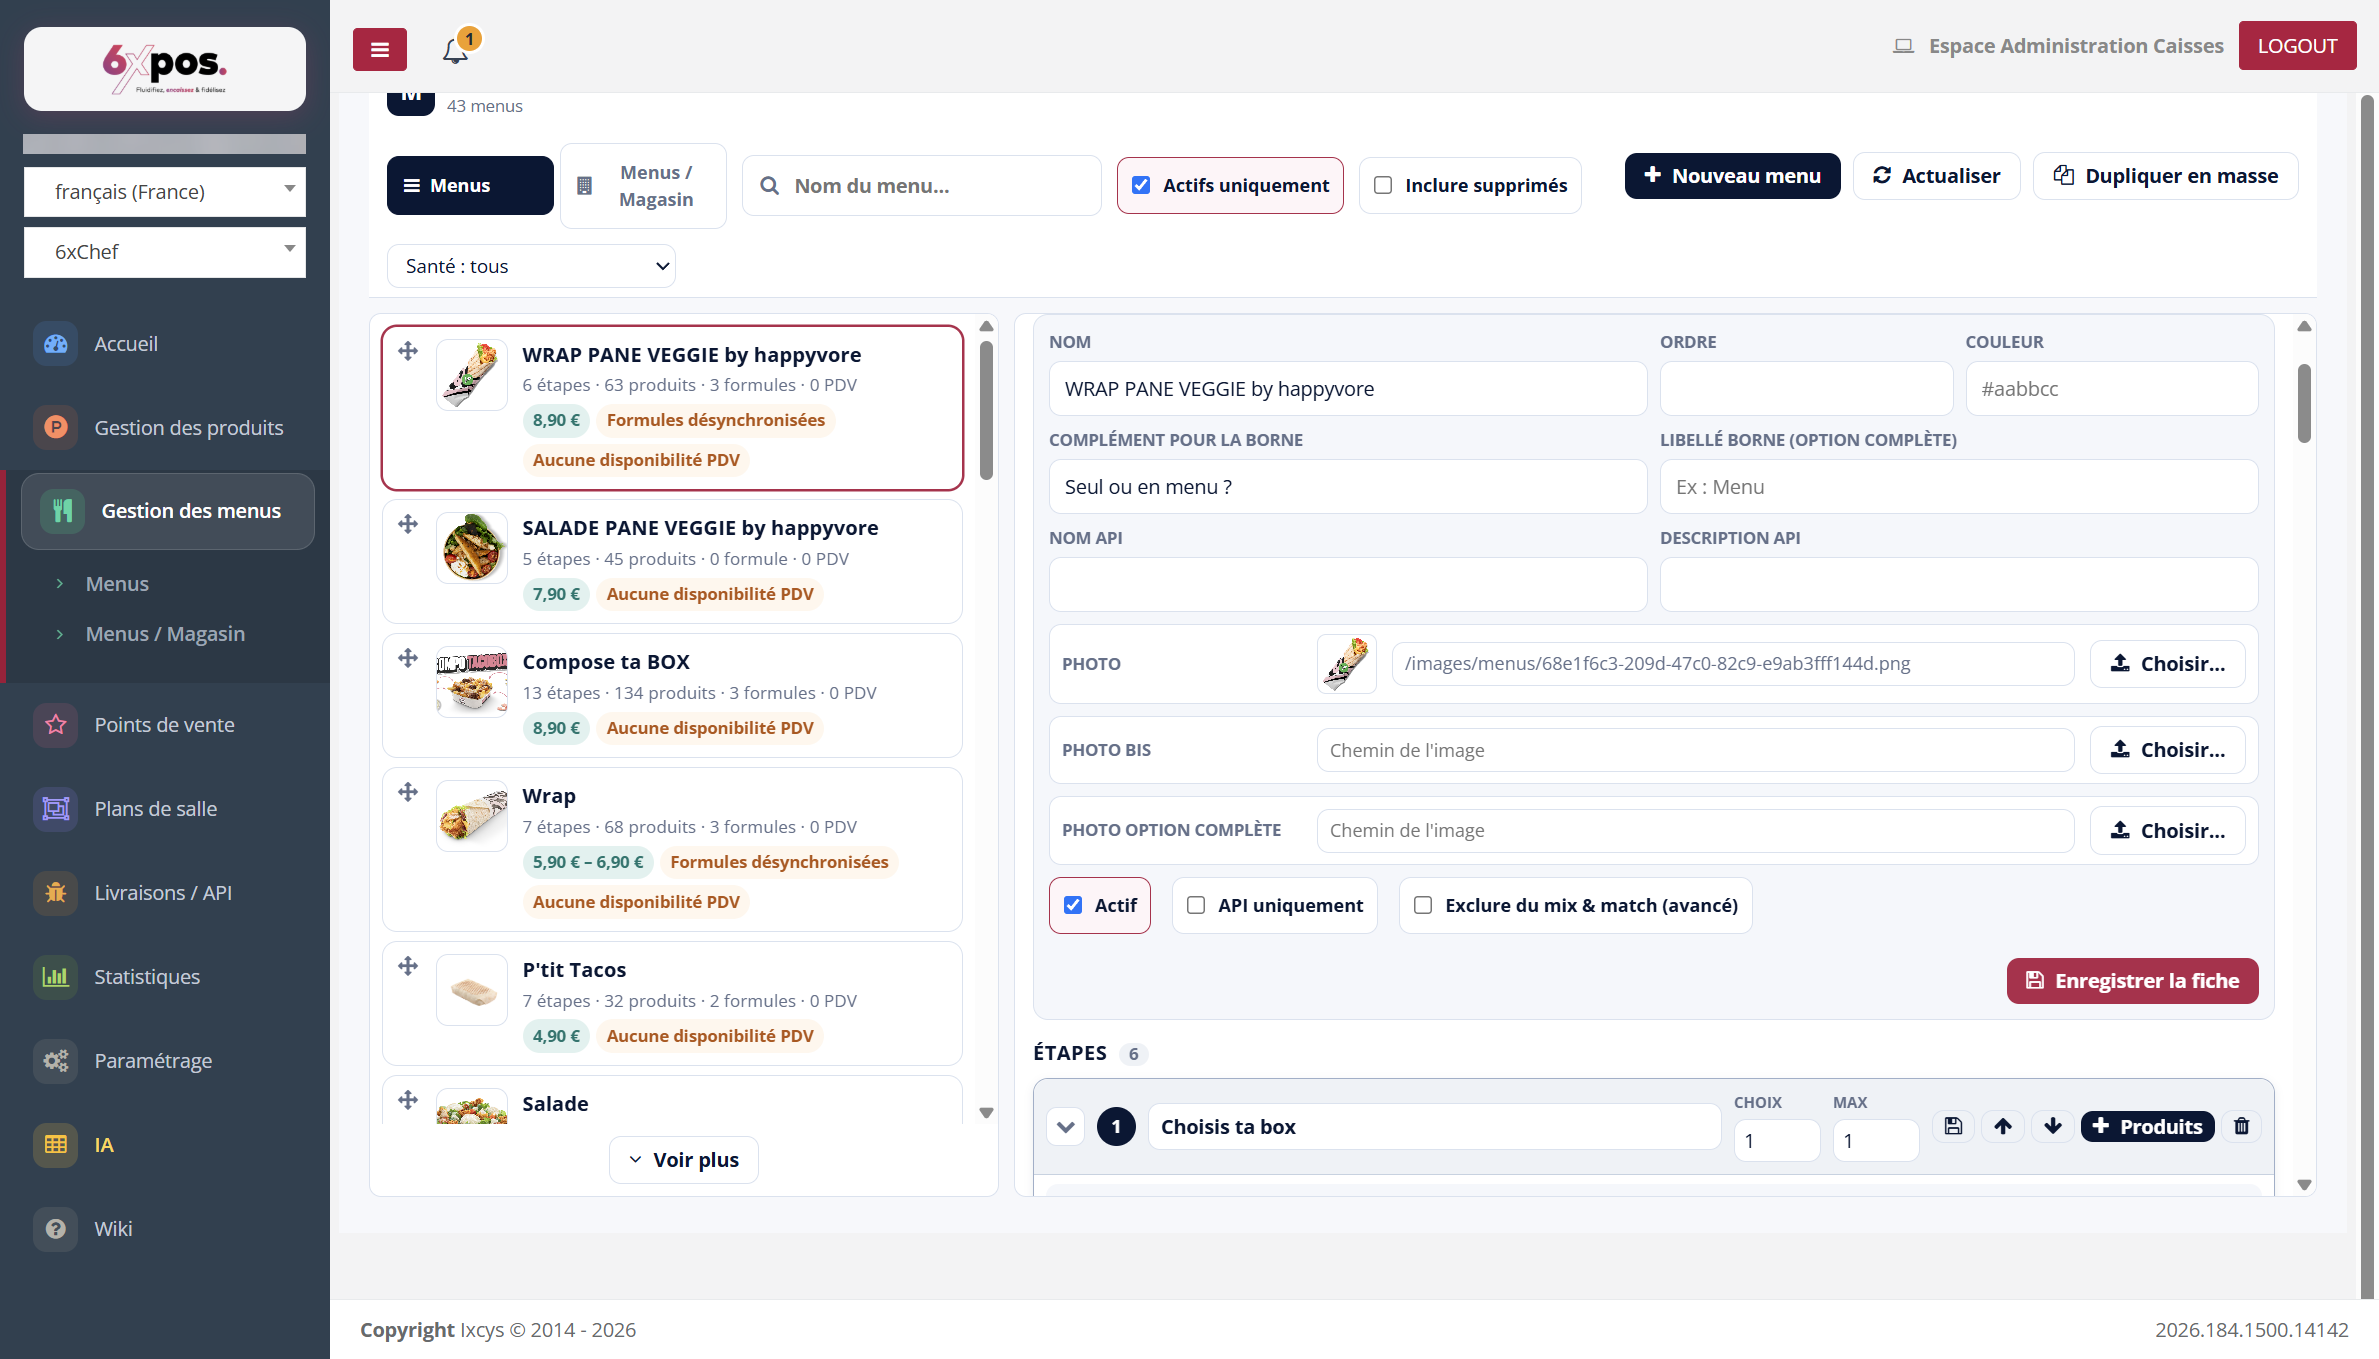
Figure 5 — The sheet form: names (kiosk, API), colour, the 3 photos and the toggles.
- Fields: name, order, colour, add-on text for the kiosk (e.g. “On its own or as a menu?”), kiosk label for the full option, API name and description (online sales).
- Toggles: Active / API only (menu reserved for platforms) / Exclude from mix & match (advanced).
- Images: Photo, Alt photo and Full-option photo — a “Choose…” button for each.
Good to know — sending an image does NOT save the sheet: after the “Image sent” toast, you must click “Save the sheet”, otherwise the path is lost.