Restaurant floor plan (visual editor)
This is where you draw each room: you place the tables and the decorative elements with the mouse.
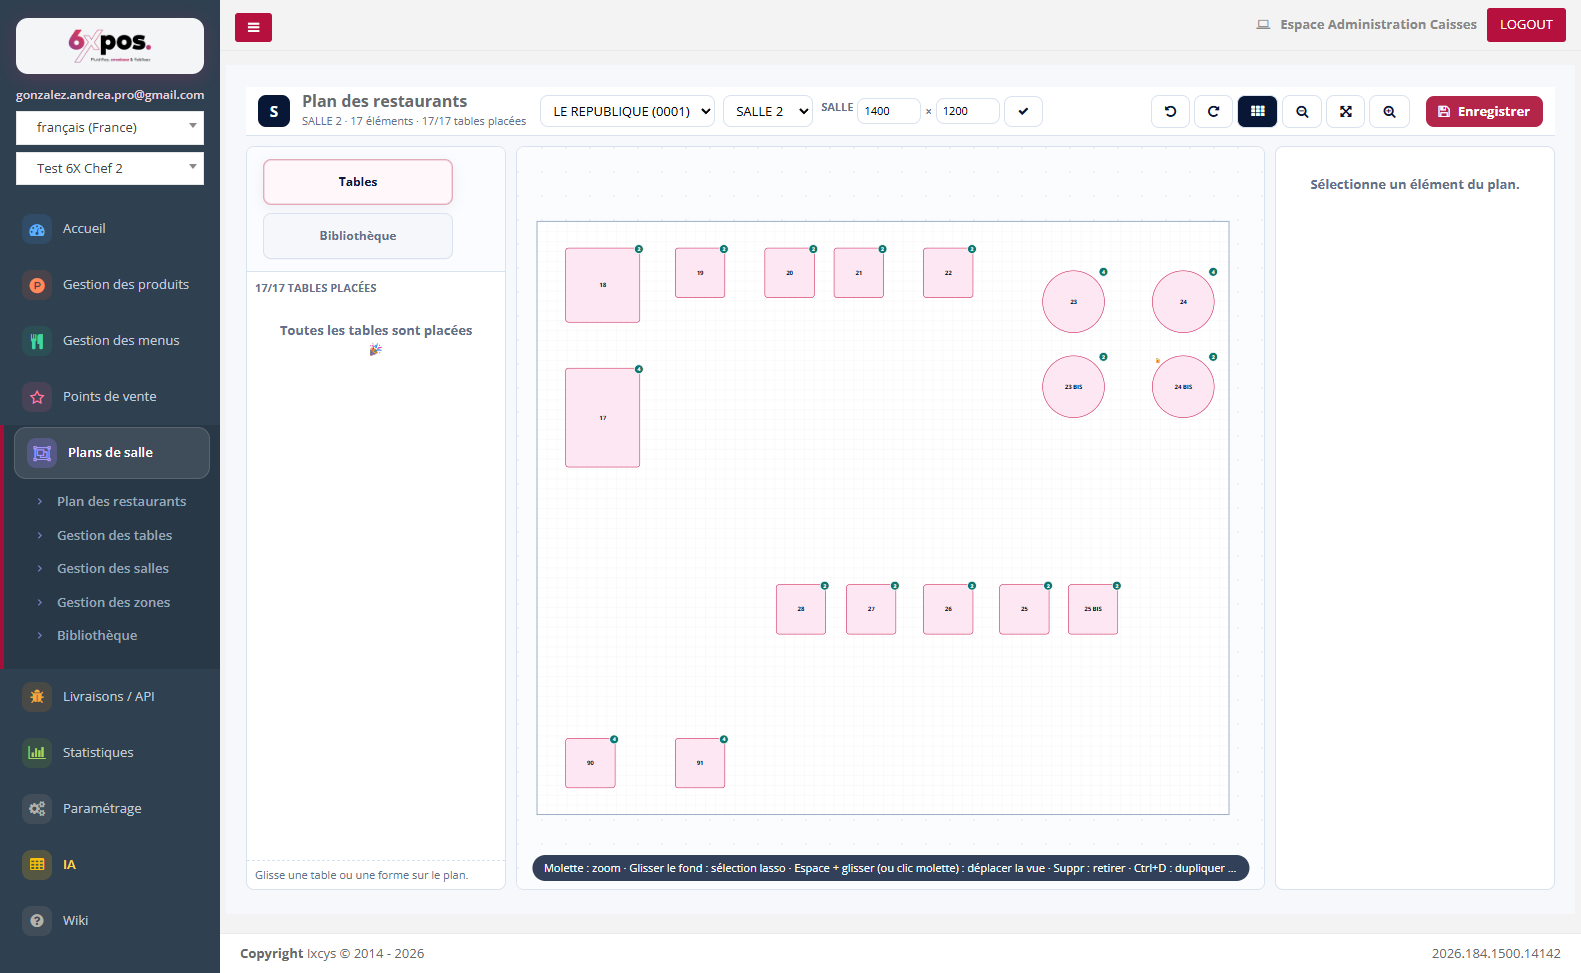
Figure 1 — The floor plan editor: palette on the left, plan in the center, properties on the right.
The toolbar
- Point of sale and room: the first two selectors choose the PDV and then the room to edit.
- Room (dimensions): width × height of the room in centimeters; confirm with the check mark to resize.
- Buttons on the right: undo / redo, snap grid, zoom in/out, fit to window, and Save.
The palette (left panel)
Two tabs feed the plan by drag and drop:
- Tables: the list of the room's tables not yet placed. The counter (e.g. "17/17 tables placed") shows the progress; once everything is placed, the list is empty.
- Library: the shapes available for this PDV: room backgrounds (mezzanine, ground floor…) and table templates (round, square, oval, rectangular). See the Library chapter.
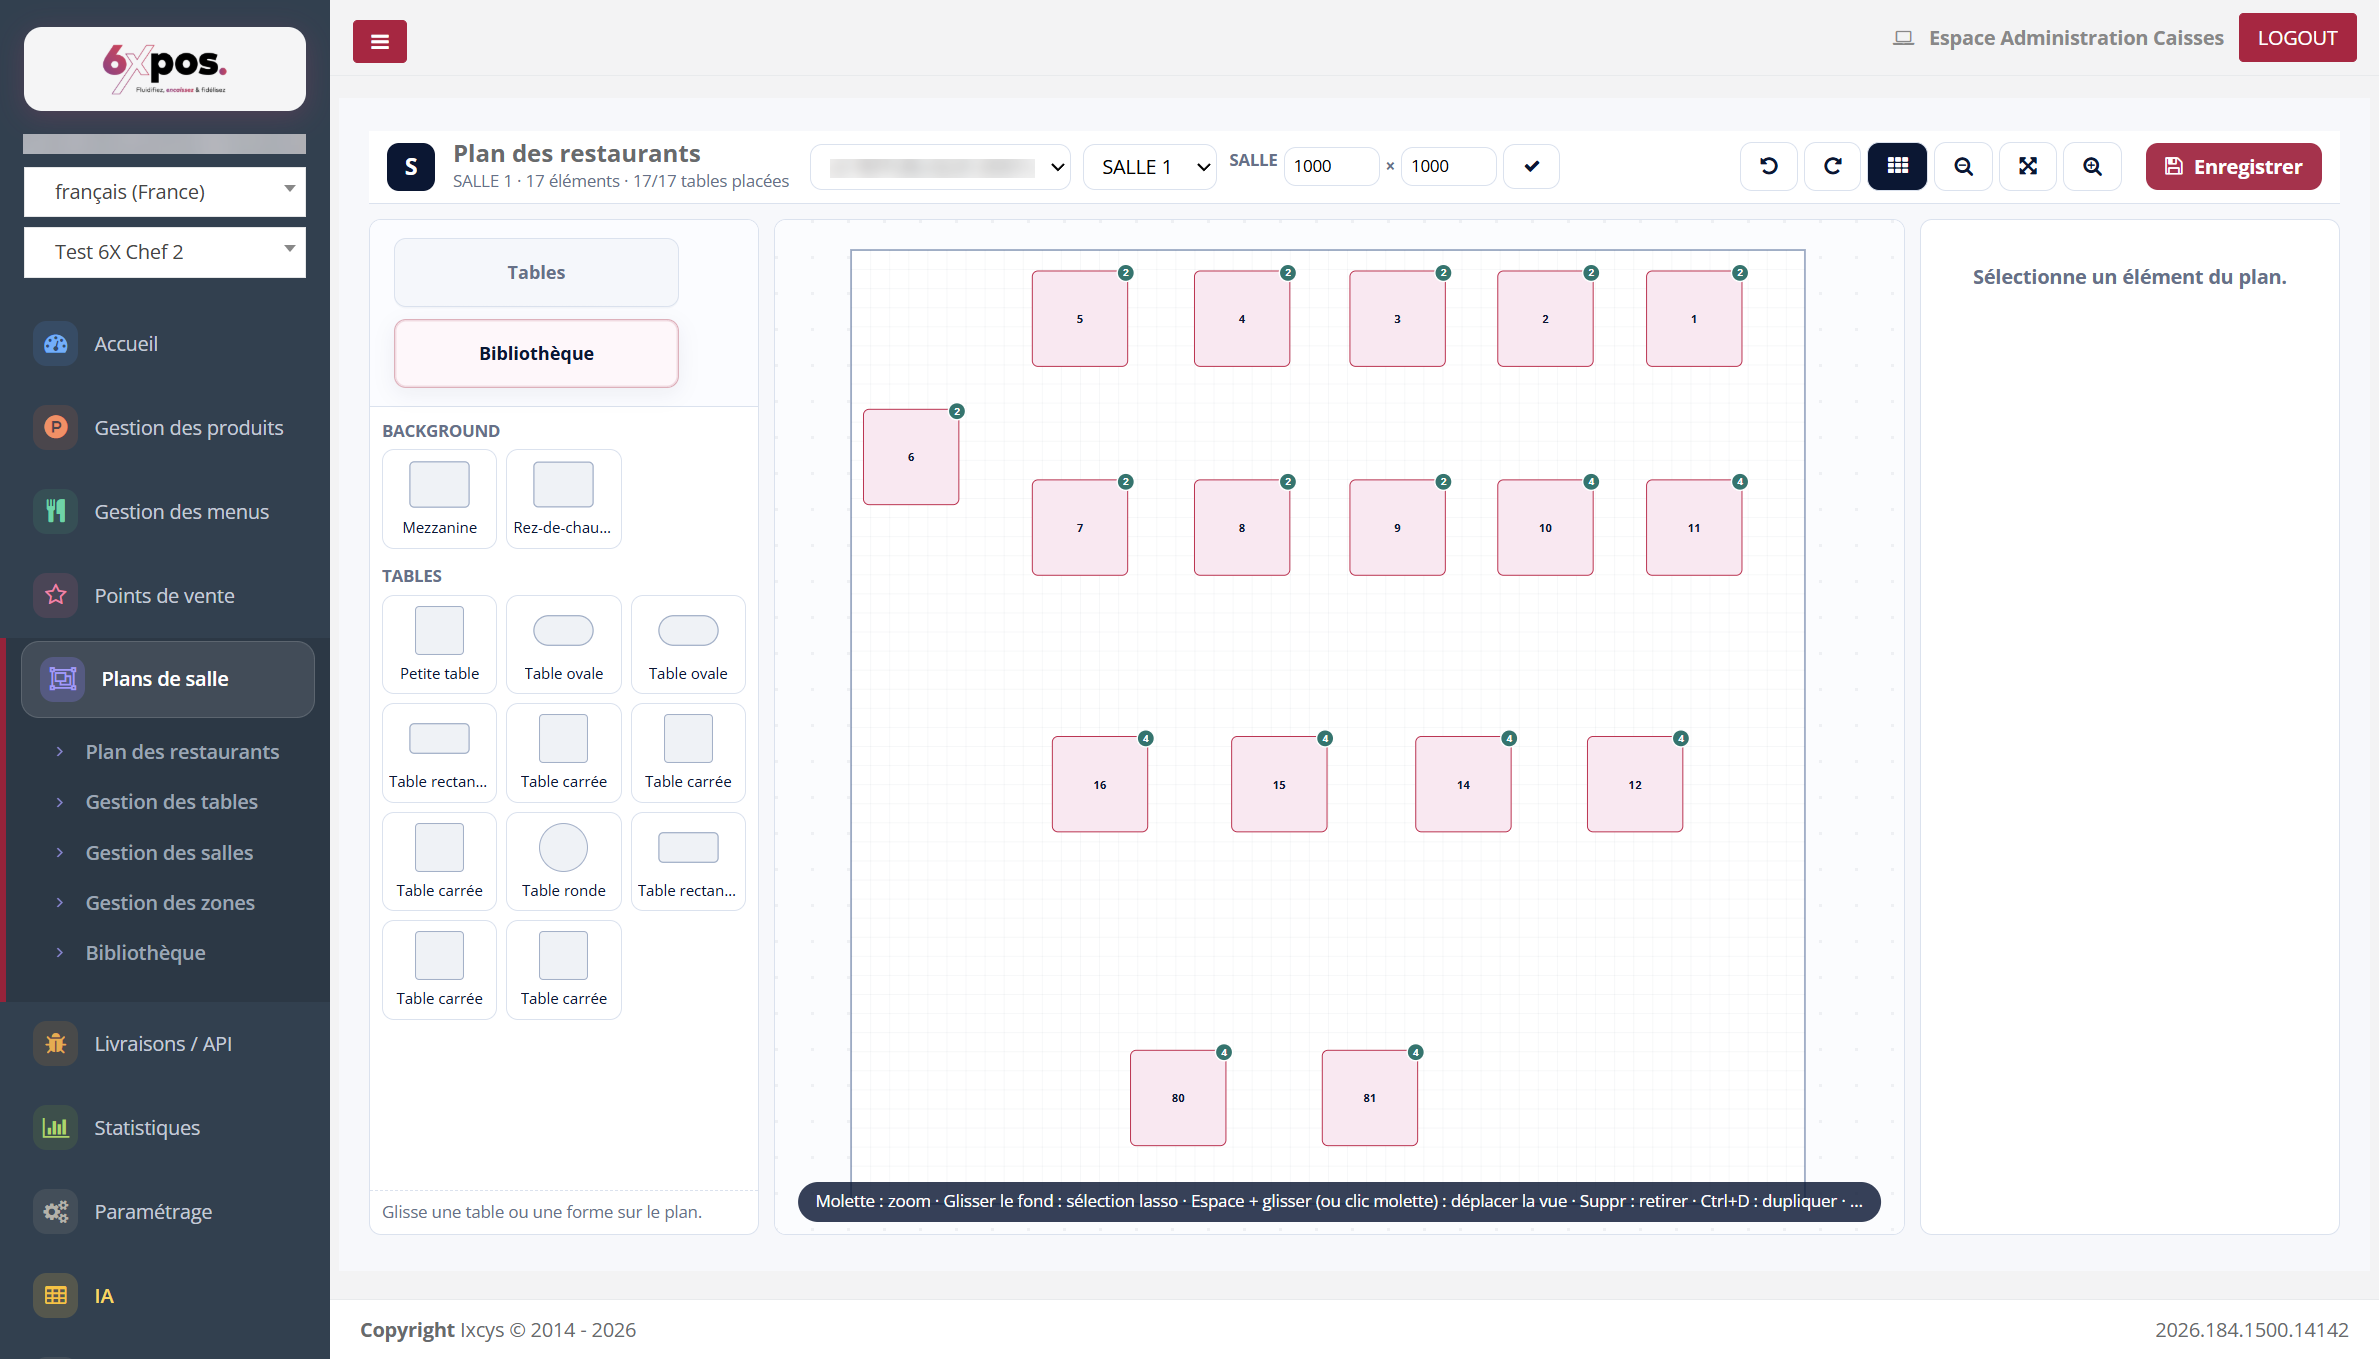
Figure 2 — The palette's Library tab: backgrounds and templates to drag onto the plan.
The plan and the selection
Clicking an element on the plan selects it: its properties appear on the right.
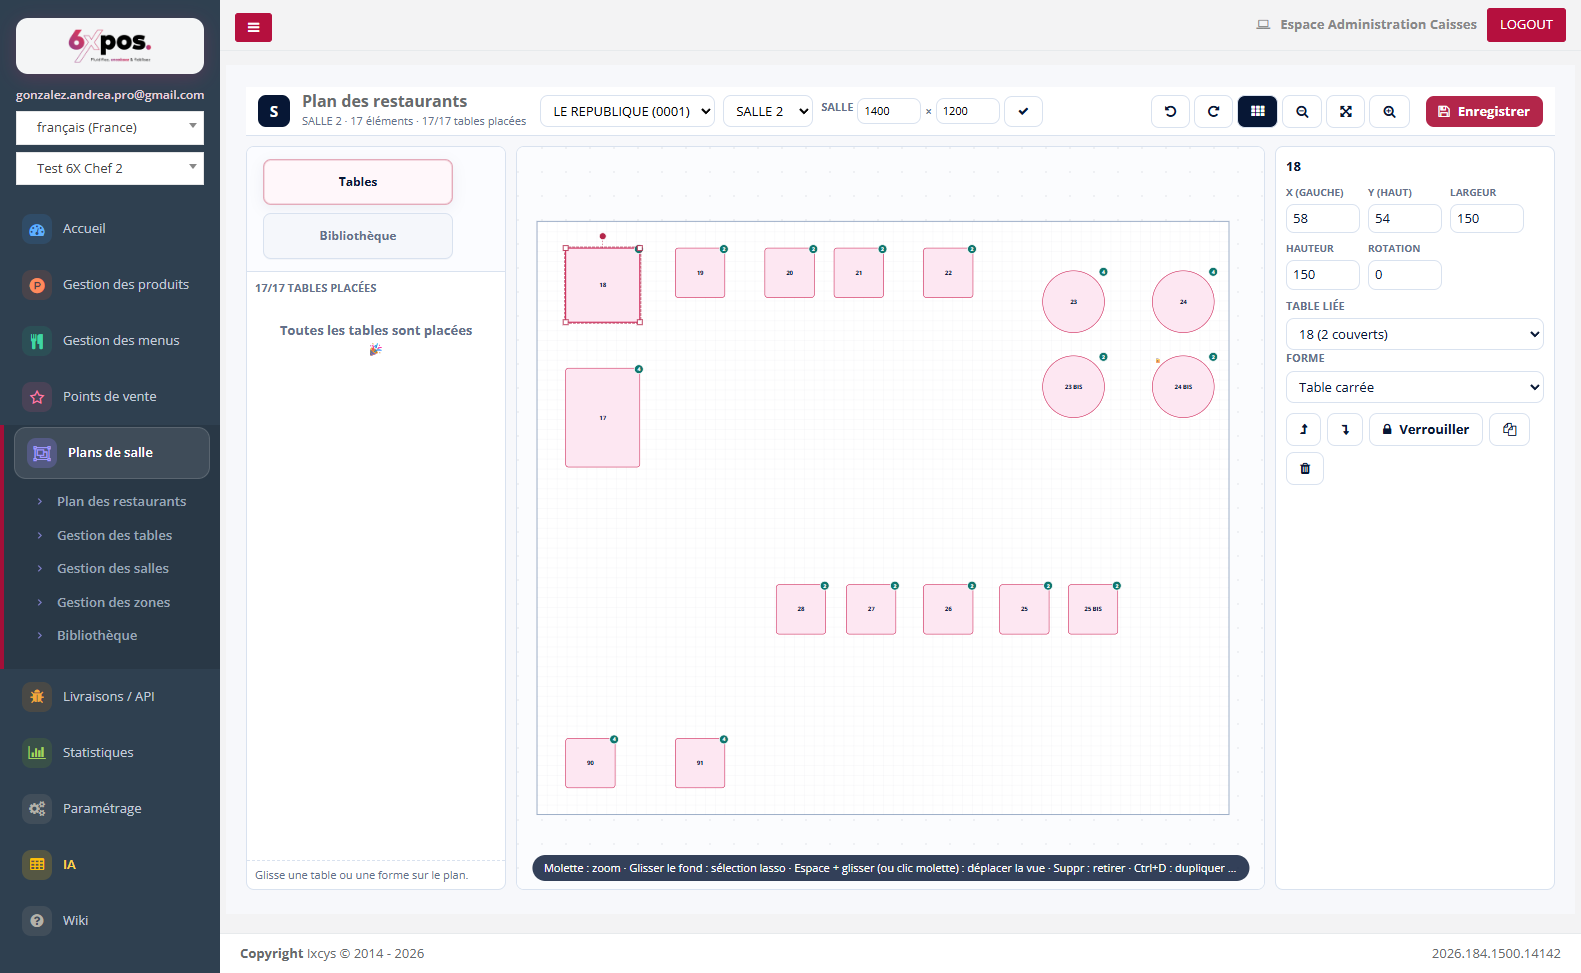
Figure 3 — Selected table: position, dimensions, rotation, linked table, shape and actions.
- X / Y / Width / Height / Rotation: precise position and geometry of the element (editable with the keyboard for perfect alignment).
- Linked table: associates the drawn element with a table declared in Table management (with its number of covers) — it is this link that makes the table exist at the POS till.
- Shape: the visual template used (square table, round table…).
- Actions: bring forward / send backward in the stacking order, lock (protects against accidental moves), duplicate, delete.
Good to know — the shortcuts shown below the plan save a lot of time: scroll wheel = zoom, dragging the background = lasso selection, Space + drag (or middle-click) = pan the view, Del = remove, Ctrl+D = duplicate.
Good to know — changes are only applied when you click "Save" — the pending-changes badge is there to remind you.